The Best Fluffy Pancakes recipe you will fall in love with. Full of tips and tricks to help you make the best pancakes.
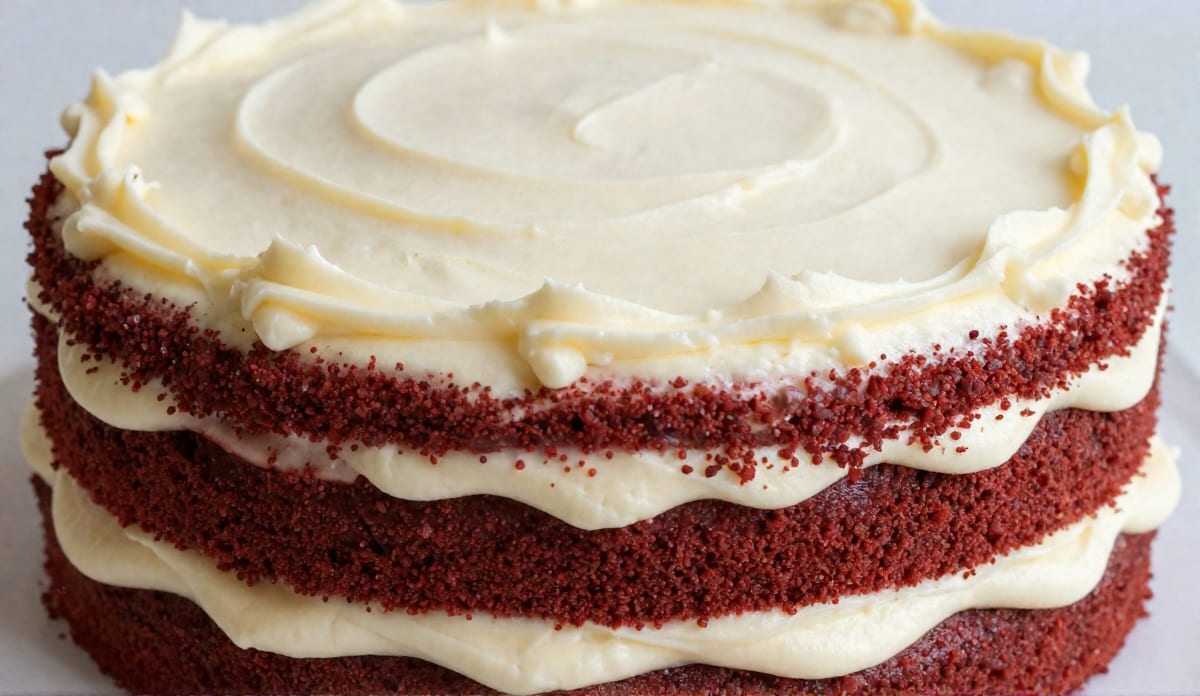
This classic red velvet cake has soft, tender layers, a mild cocoa flavor, and a tangy cream cheese frosting. Butter adds flavor, while vegetable oil helps keep the crumb soft and moist, even after the cake has been refrigerated. Buttermilk adds a subtle tang that pairs especially well with the cream cheese frosting.
The cake layers are simple to make from scratch and can be prepared ahead of time, making this a practical choice for birthdays, holidays, or whenever you want a homemade layer cake without complicated techniques.
Why This Recipe Works
- Butter and vegetable oil: Butter adds flavor, while the oil helps keep the cake soft and moist.
- Buttermilk: Adds moisture and a mild tang that balances the sweetness and cocoa.
- Dutch-process cocoa: Adds a subtle chocolate flavor without making the cake taste like a traditional chocolate cake.
- Red gel food coloring: Gives the cake its classic red color without adding much extra liquid to the batter.
- Cream cheese frosting: The tangy frosting balances the sweet cake and adds a smooth, creamy finish.
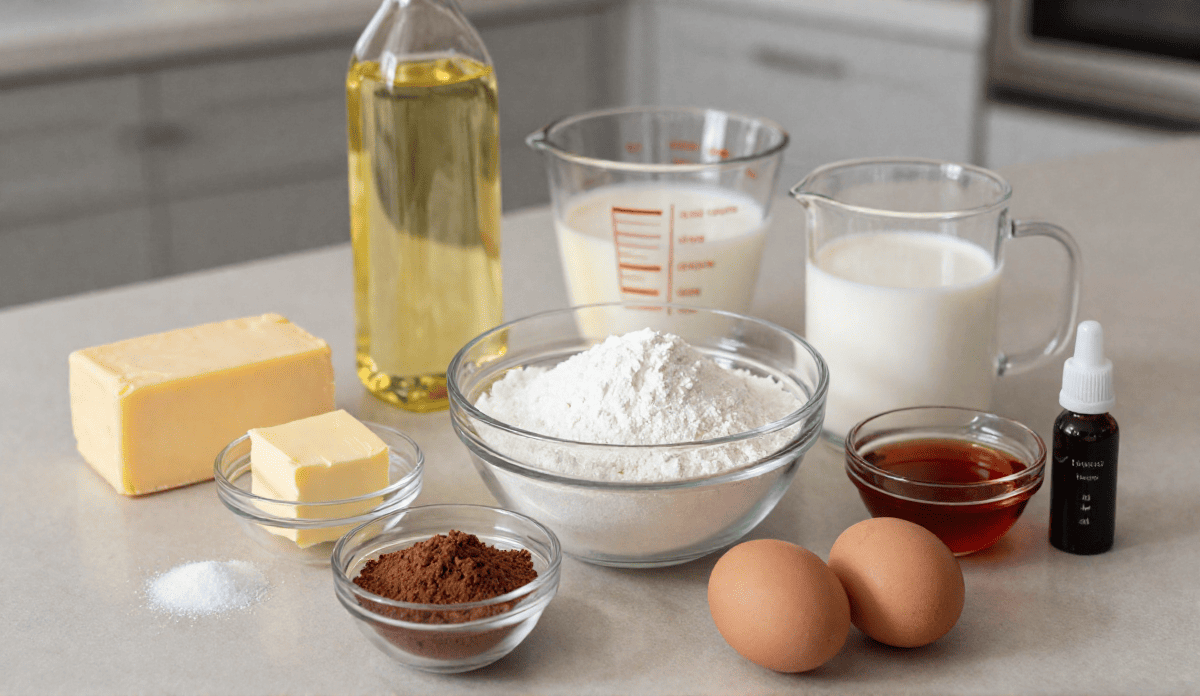
Key Ingredients
Buttermilk
Buttermilk helps keep the cake tender and adds a mild tang. Use it at room temperature so it blends more easily into the batter.
Dutch-Process Cocoa Powder
Only a small amount of cocoa is needed for this recipe. It gives the cake its familiar background chocolate flavor without overpowering the red velvet flavor.
Butter and Vegetable Oil
Butter adds richness and flavor, while the oil helps keep the crumb soft and moist, including after refrigeration.
Red Gel Food Coloring
Gel food coloring gives the batter a deeper red color without adding much extra liquid. This helps maintain the consistency of the cake batter.
Block Cream Cheese
Use full-fat, brick-style cream cheese for the frosting. Tub-style cream cheese contains more moisture and can make the frosting softer and more difficult to spread.
What to Expect From the Cake
The batter will be relatively thin compared with a traditional butter cake. That is normal, so don’t add extra flour.
After baking, the cake layers should feel soft and spring back lightly when pressed in the center. The finished cake has a mild cocoa flavor rather than a strong chocolate taste, allowing the tangy cream cheese frosting to stand out.
Step-by-Step Instructions
Step 1: Prepare the Pans and Dry Ingredients
Preheat the oven to 350°F (175°C).
Grease two 9-inch round cake pans, line the bottoms with parchment paper, and lightly flour the sides.
In a large bowl, whisk together the all-purpose flour, baking soda, salt, and Dutch-process cocoa powder.
Set the dry ingredients aside.
Step 2: Mix the Butter, Oil, and Sugar
In a separate large bowl, or in the bowl of a stand mixer fitted with the paddle attachment, beat the softened butter, vegetable oil, and granulated sugar until smooth and well combined.
Add the eggs one at a time, mixing well after each addition.
Add the buttermilk, vanilla extract, and red gel food coloring. Mix until the batter is evenly colored.
Step 3: Combine the Batter
With the mixer on low speed, gradually add the dry ingredients to the wet mixture in two batches.
Mix only until the flour disappears. Avoid overmixing, which can make the cake less tender.
Add the distilled white vinegar at the end and mix briefly until incorporated.
Step 4: Bake the Cake Layers
Divide the batter evenly between the prepared cake pans.
Bake for 28 to 32 minutes, or until a toothpick inserted into the center comes out clean or with a few moist crumbs.
Let the cakes cool in their pans for about 10 minutes. Carefully turn them onto wire racks and allow them to cool completely before frosting.
Do not frost the cake while the layers are still warm, or the cream cheese frosting may soften and slide.
Step 5: Make the Cream Cheese Frosting
Place the softened cream cheese and butter in a large bowl.
Beat on medium-high speed for 2 to 3 minutes, until smooth and creamy.
Add the vanilla extract and salt.
Gradually add the sifted powdered sugar, about 1 cup at a time, mixing on low speed after each addition.
Once all the sugar has been incorporated, increase the speed and beat for another 1 to 2 minutes, until the frosting is smooth and fluffy.
If the frosting feels too soft to spread, refrigerate it for about 10 to 15 minutes before assembling the cake.
Step 6: Assemble the Cake
Place one completely cooled cake layer on a serving plate or cake stand.
Spread an even layer of cream cheese frosting over the top.
Place the second cake layer on top and frost the top and sides of the cake.
For a simple finish, you can trim a thin layer from the tops of the cakes before assembling. Crumble the trimmed cake and use the crumbs to decorate the frosted cake.
Baker’s Tips for Success
Use Room Temperature Ingredients
Room-temperature eggs, buttermilk, butter, and cream cheese blend more evenly and help prevent the batter or frosting from becoming lumpy.
Measure the Flour Correctly
Spoon the flour into your measuring cup and level it with the back of a knife. Avoid scooping directly from the flour bag, which can pack too much flour into the cup and make the cake dense.
Don’t Overmix
Once the flour is added, mix only until the batter comes together. Overmixing can develop too much gluten and result in a tougher crumb.
Let the Layers Cool Completely
Even slightly warm cake can soften cream cheese frosting. Give the layers plenty of time to cool before assembling.
Chill Soft Frosting
If your frosting is difficult to spread, place it in the refrigerator for 10 to 15 minutes. It should become easier to work with without becoming too firm.
Frequently Asked Questions
Why is vinegar used in red velvet cake?
The small amount of distilled white vinegar adds acidity to the batter and works with the baking soda. It also contributes to the tender texture of the cake.
Can I make the cake layers ahead of time?
Yes. Bake the layers up to 1 day ahead and keep them tightly wrapped at room temperature. For longer storage, freeze the cooled layers for up to 2 months.
If frozen, thaw the layers while still wrapped before frosting.
Why is my red velvet cake not bright red?
The final color can vary depending on the type and brand of cocoa powder and red food coloring you use. Gel food coloring generally produces a stronger color than liquid food coloring.
Can I use liquid food coloring?
Yes. Liquid food coloring will work, but you may need more of it to get the same deep red color. Adding a large amount can slightly loosen the batter, which is why gel coloring is preferred for this recipe.
Can I make the frosting ahead of time?
Yes. Store the prepared frosting in an airtight container in the refrigerator for up to 3 days. Let it soften slightly and give it a quick mix before spreading.
Perfect Pairings & Serving Ideas
This rich red velvet cake pairs wonderfully with a scoop of 10-Minute Prep No-Cook Vanilla Ice Cream or a warm slice of The Absolute Best Banana Bread Recipe. For a complete party dessert table, serve it alongside The Ultimate Chewy Chocolate Chip Cookies or fudgy Ultimate Fudgy Chocolate Brownies.
Make-Ahead Instructions
You can bake the cake layers a day ahead and keep them tightly wrapped at room temperature.
For longer storage, wrap the completely cooled layers individually in plastic wrap, place them in a freezer-safe bag or container, and freeze for up to 2 months.
The frosting can also be prepared up to 3 days ahead and refrigerated. Allow it to soften slightly before using.
Storage
Store the fully frosted cake covered in the refrigerator for up to 5 days.
For the best texture and flavor, let the cake sit at room temperature for 15 to 20 minutes before serving.

Classic Red Velvet Cake
Learn how to make the ultimate classic Red Velvet Cake with tender, moist layers, a mild cocoa flavor, and a rich cream cheese frosting. This homemade layer cake is perfect for birthdays, holidays, and special occasions.
Ingredients
Equipment
Method
Make the Cake Layers
- Preheat the oven to 350°F (175°C). Grease two 9-inch round cake pans, line the bottoms with parchment paper, and lightly flour the sides.
- In a large bowl, whisk together the flour, baking soda, salt, and Dutch-process cocoa powder.
- In a separate large bowl, beat the softened butter, vegetable oil, and granulated sugar until smooth and well combined. Add the eggs one at a time, mixing well after each addition.
- Add the buttermilk, vanilla extract, and red gel food coloring. Mix until the batter is evenly colored.
- Gradually add the dry ingredients in two batches, mixing on low speed just until the flour disappears. Avoid overmixing.
- Add the distilled white vinegar and mix briefly until incorporated.
- Divide the batter evenly between the prepared cake pans.
- Bake for 28 to 32 minutes, or until a toothpick inserted into the center comes out clean or with a few moist crumbs.
- Cool the cakes in the pans for about 10 minutes, then carefully transfer them to a wire rack. Allow them to cool completely before frosting.
Make the Cream Cheese Frosting
- Beat the softened cream cheese and butter on medium-high speed for 2 to 3 minutes, until smooth and creamy.
- Add the vanilla extract and salt.
- Gradually add the sifted powdered sugar, about 1 cup at a time, mixing on low speed after each addition.
- Increase the mixer speed and beat for another 1 to 2 minutes, until the frosting is smooth and fluffy.
- If the frosting feels too soft to spread, refrigerate it for 10 to 15 minutes before assembling the cake.
Assemble
- Place one completely cooled cake layer on a serving plate or cake stand.
- Spread an even layer of cream cheese frosting over the top.
- Place the second cake layer on top.
- Frost the top and sides of the cake.
- For an optional simple finish, trim a thin layer from the tops of the cake layers before assembling. Crumble the trimmed cake and sprinkle the crumbs over the frosted cake.