The Best Fluffy Pancakes recipe you will fall in love with. Full of tips and tricks to help you make the best pancakes.
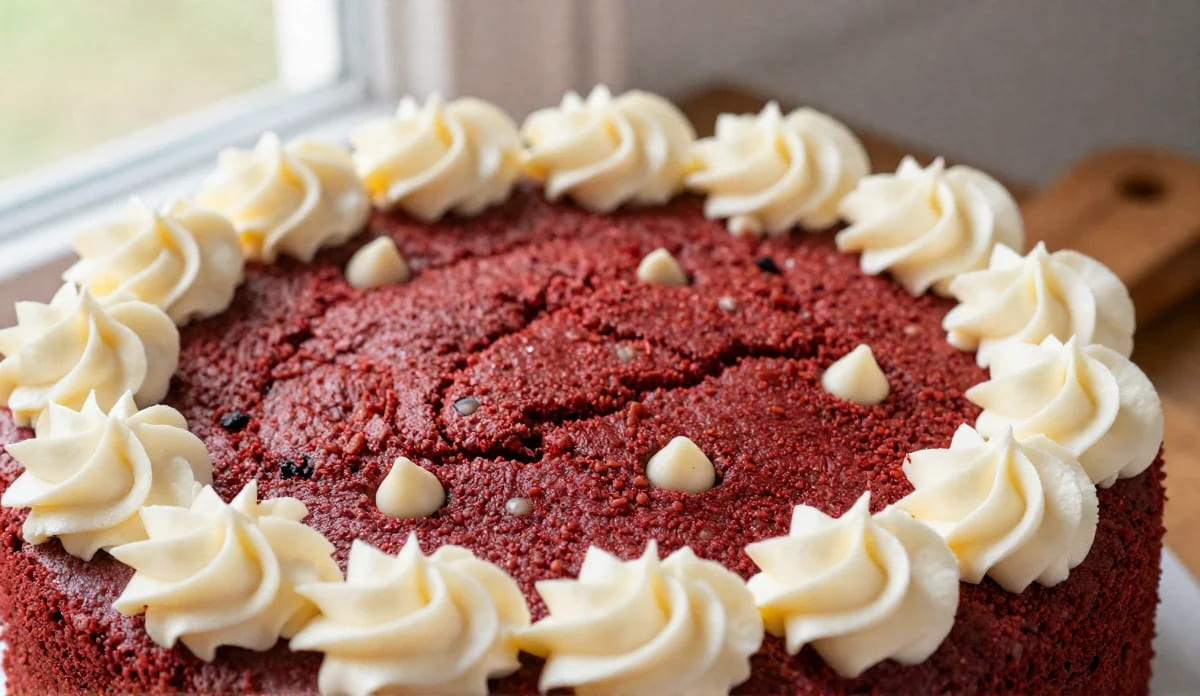
Let’s be honest: regular cookies are fantastic, but there is something incredibly festive and fun about a giant cookie cake. If you are looking for the ultimate crowd-pleaser that combines the rich, buttery chew of a classic chocolate chip cookie with the dramatic flair of red velvet, you are in the right place.
This Red Velvet Cookie Cake features a deeply fudgy, vibrant red cookie base loaded with sweet white chocolate chips, baked to perfection with soft, chewy centers and slightly crisp edges. To top it all off, we are piping a rich, tangy cream cheese frosting border around the edges because red velvet simply isn’t complete without it.
Whether you’re celebrating a birthday, Valentine’s Day, or just want a weekend baking project, this recipe is guaranteed to steal the show.
Why You’ll Love This Cookie Cake
No Chilling Required: Unlike traditional cookies, you don’t have to wait hours for the dough to chill. Just mix, press into the pan, and bake!
The Perfect Texture: It has that coveted bakery-style texture—dense, chewy, and incredibly moist.
Stunning Presentation: The contrast between the deep red cookie, the white chocolate pockets, and the creamy piped frosting looks like it came straight from a high-end bakery.
How to Get Clean, Bakery-Style Slices
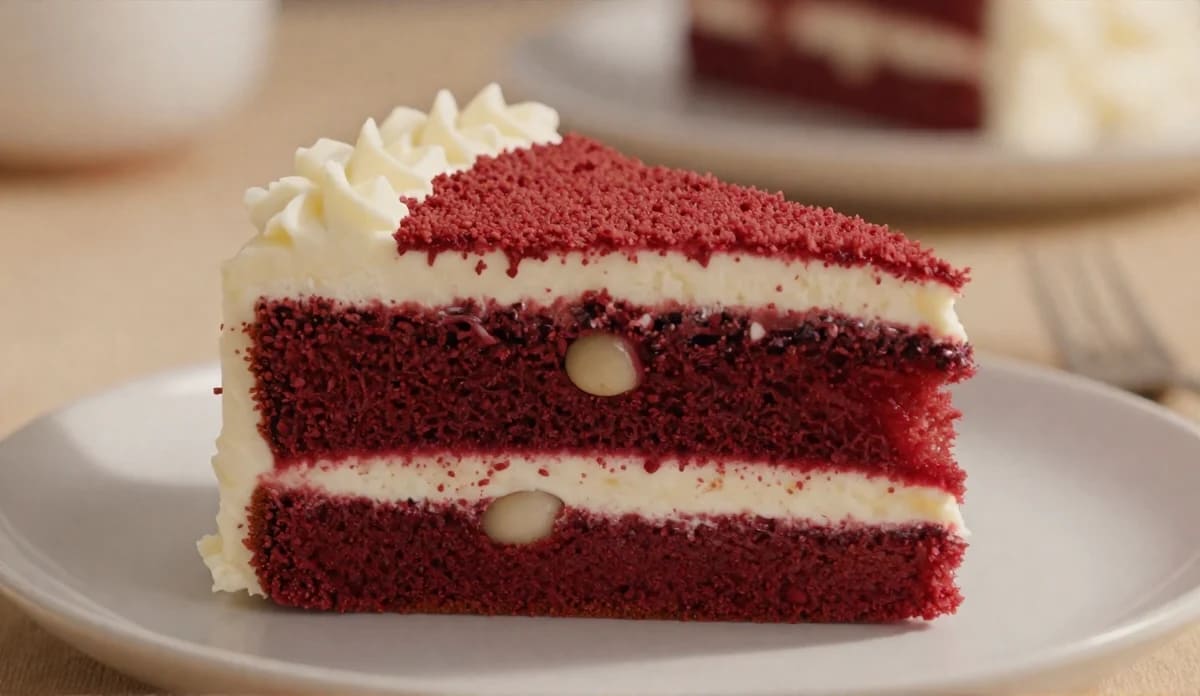
There is nothing more frustrating than spending time decorating a gorgeous cookie cake, only to have the first slice turn into a crumbly mess. To get those clean, sharp bakery-style cuts, you have to let the cookie cake cool completely—seriously, don’t rush this! Once it’s cool, pop the cake in the fridge for about 20 to 30 minutes to firm up slightly. When you’re ready to cut, run a large, sharp chef’s knife under hot water, wipe it dry, and make your slice. Be sure to wipe the blade clean with a damp paper towel between every single cut. It sounds a bit extra, but it keeps the white cream cheese frosting from smearing onto the deep red cookie base, leaving you with picture-perfect slices every time.
Balancing the Sweetness: Smart Mix-In Swaps
While white chocolate chips are the classic, traditional choice for red velvet, they can sometimes make the cake a bit too sweet for some palates. If you want to tone down the sweetness, I highly recommend swapping half of the white chocolate chips for high-quality semi-sweet or dark chocolate chunks. The slightly bitter notes of dark chocolate pair beautifully with the cocoa in the dough and cut through the richness of the frosting. Another fun bakery secret? Toss a half-cup of toasted, finely chopped pecans into the dough along with the chips. It adds a wonderful, buttery crunch that elevates the whole texture!
Ingredients You’ll Need
This recipe uses simple, pantry-staple ingredients. For the best color and texture, I highly recommend using gel food coloring instead of liquid, as it gives you that signature vibrant red without watering down the cookie dough.
For the Red Velvet Cookie:
All-purpose flour: 2 cups (spooned and leveled)
Unsweetened cocoa powder: 3 tablespoons (Dutch-processed or natural works fine)
Cornstarch: 1 teaspoon (this is the secret to a super soft, tender cookie!)
Baking soda: ½ teaspoon
Salt: ½ teaspoon
Unsalted butter: ¾ cup (1.5 sticks), melted and cooled slightly
Brown sugar: ¾ cup (packed, light or dark)
Granulated sugar: ½ cup
Egg: 1 large egg + 1 egg yolk (at room temperature)
Vanilla extract: 2 teaspoons
Red gel food coloring: 1 to 1.5 teaspoons (adjust based on how vibrant you want it)
White chocolate chips: 1 cup (plus a handful more to press on top)
For the Cream Cheese Frosting:
Cream cheese: 4 oz (half a block), softened to room temperature
Unsalted butter: ¼ cup (half a stick), softened
Powdered sugar: 1.5 to 2 cups
Vanilla extract: 1 teaspoon
Pinch of salt
How to Make This Red Velvet Cookie Cake (The Quick Guide!)
Here’s a quick snapshot of how this beautiful cookie cake comes together. For the exact measurements and detailed temperatures, scroll down to the recipe card below!
Step 1: Prep & Mix Dry Ingredients: Start by preheating your oven and prepping your pan. In a medium bowl, whisk together your flour, cocoa powder, baking soda, salt, and our secret weapon for softness—cornstarch!
Step 2: Wet Ingredients & The Red Color: Whisk your melted butter with both sugars. Stir in the egg, yolk, vanilla, and that vibrant red gel food coloring. Once it’s a beautiful, deep red, gently fold in your dry ingredients and those sweet white chocolate chips.
Step 3: Press & Bake: Press the cookie dough evenly into your pan (toss a few extra chocolate chips on top for that bakery look!). Bake just until the edges are set. Remember, we want the center soft and chewy, so don’t overbake it!
Step 4: Frost & Decorate: While the cake cools completely, whip up a quick and creamy frosting using cream cheese, butter, and powdered sugar. Pipe gorgeous swirls around the border, slice, and dive in!
Pro-Tips for the Best Cookie Cake
Don’t Overbake: The golden rule of cookie cakes is to underbake them slightly. If you wait until the center looks fully dry, the cake will end up dry and crumbly once cooled.
Gel Color is King: Liquid food coloring can alter the science of your dough and won’t give you that rich, velvety red hue. Brands like Americolor or Wilton gel paste are perfect for this.
Room Temp Cream Cheese: Ensure your cream cheese and butter are truly at room temperature before making the frosting, or you’ll end up with frustrating little lumps.
Frequently Asked Questions (FAQs)
Can I make this cookie cake ahead of time?
Absolutely! You can bake the cookie cake a day in advance. Just let it cool completely, wrap it tightly in plastic wrap, and store it at room temperature. I highly recommend waiting to pipe the cream cheese frosting until the day you plan to serve it so the frosting stays perfectly fresh and beautiful.
Why is my red velvet cookie cake brown instead of red?
This usually happens for two reasons: using the wrong type of food coloring or using too much cocoa powder. Make sure to use gel food coloring rather than liquid, as gel is highly concentrated and won’t lose its color during baking. Also, stick strictly to the 3 tablespoons of cocoa powder—any more will overpower the red hue and turn the dough brown.
Do I have to refrigerate this cookie cake?
Because of the cream cheese frosting, any leftovers should be stored in an airtight container in the refrigerator. It will keep beautifully for up to 5 days. Just let your slice sit on the counter for about 15–20 minutes before eating to let the cookie soften back up to its perfect, chewy texture!
Can I freeze red velvet cookie cake?
Yes! You can freeze the baked, unfrosted cookie cake for up to 3 months. Wrap it tightly in plastic wrap, then in aluminum foil. When you’re ready to serve, thaw it overnight in the refrigerator, bring it to room temperature, whip up a fresh batch of cream cheese frosting, and decorate!
Can I use a regular 9-inch cake pan instead of a springform pan?
You sure can! Just make sure to line the bottom of your cake pan with parchment paper and leave a little overhang on the sides. This makes it super easy to lift the giant cookie cake out of the pan once it has cooled completely.
The Ultimate Red Velvet Cookie Cake
A giant, chewy red velvet cookie cake loaded with white chocolate chips and topped with a creamy, piped cream cheese frosting. The perfect dessert for celebrations!
Ingredients
Method
- Preheat and Prep the Pan: Preheat your oven to 350°F (175°C). Lightly grease a 9-inch springform pan, cake pan, or cast-iron skillet with non-stick baking spray, or line the bottom with a round of parchment paper for easy removal.
- Whisk the Dry Ingredients: In a medium mixing bowl, whisk together the all-purpose flour, unsweetened cocoa powder, cornstarch, baking soda, and salt until well combined and lump-free. Set aside.
- Combine the Wet Ingredients & Color: In a large mixing bowl, vigorously whisk the melted and slightly cooled butter with the light brown sugar and granulated sugar until smooth. Whisk in the egg, egg yolk, vanilla extract, and red gel food coloring. Mix until the color is vibrant and the mixture is fully emulsified.
- Form the Cookie Dough: Pour the dry ingredient mixture into the wet ingredients. Using a rubber spatula or wooden spoon, gently fold the mixture together just until a soft dough forms—be careful not to overmix, as this can make the cookie cake dense. Gently fold in the white chocolate chips.
- Press and Bake: Press the cookie dough evenly into the prepared 9-inch pan. Scatter a handful of extra white chocolate chips on top and press them in lightly. Bake for 20 to 22 minutes. The edges should look set and slightly golden, but the center will still look soft and slightly underbaked.
- Cool Completely :Remove the pan from the oven and place it on a wire rack. Let the cookie cake cool completely in the pan before attempting to frost or remove it, as it will continue to firm up as it cools.
- Whip Up the Frosting: In a medium bowl, beat the softened cream cheese and butter together using a hand mixer on medium-high speed for about 2 minutes until completely smooth. Gradually add the powdered sugar one cup at a time, followed by the vanilla extract and a pinch of salt. Beat on high speed for another 1-2 minutes until light, fluffy, and pipeable.
- Decorate and Serve: Transfer the cream cheese frosting to a piping bag fitted with a large open star tip (like a Wilton 1M). Pipe decorative swirls or a shell border around the edge of the cooled cookie cake. Slice and serve!
Notes
- Tip for Clean Slices: For perfect bakery-style slices, let the cookie cake cool completely, chill it in the fridge for 20 minutes, and wipe your knife clean with a warm, damp cloth between each cut.
- Gel vs. Liquid Color: Always use red gel food coloring instead of liquid. Liquid food coloring can throw off the moisture balance of the dough and will not give you that vibrant red color.
- How to Store: Store leftover frosted cookie cake in an airtight container in the refrigerator for up to 5 days. Let it sit at room temp for 15 minutes before serving.